

I decided to cast my own buckram base for my first cocktail hat. Its not reallly that difficult, and its a whole heckuva lot cheaper than buying bases pre-made and decorating them. For this initial step, I acquired buckram (its sold by the yard) millinery wire, heavy duty thread, milliner's needles, basting tape, and a hatblock. I got an old one pretty cheap on ebay. Most of my supplies I got from http://www.judithm.com/
So, buckram is what hatmakers use typically; I got a yard of heavyweight and a yard of lightweight, and I got that on ebay as well. If I recall correctly, the heavier one was about $7.00 per yard and the lighter stuff cheaper yet. The lowest prices I found on pre-made buckram or sinamay hat forms had them around $6 each, or higher. So this was definitely cheaper.
Tracking down an old wooden hatblock was a little more time consuming and spendy, I think I ended up paying between 20-30 for a really old one; after losing several bids on ebay and lurking on the internets for some time.
Suggestions I've seen to cast the base *without* a hatblock include: mixing bowls, roller derby helmets, mannequin heads, or reverse casting a hat. To do this you would line one of your actual hats with plastic wrap and pour in a hardening foam or plaster of paris--I did find a video tut online but cannot recall where --a hardening foam is a good idea for reverse casting because it will remain more pliable and thus more useful as a psuedo hatblock, should you decide to move on to more complex hats in the future.
A typical hatblock is made of soft wood, so that you can also sew hats on it, meaning you can stick pins into it... anyway... with these little cocktail hats, all they need to do is curve slightly, so anything round will do it.
Think of it like making a homemade pinata, where you use plaster gauze and a balloon. The only difference is that you have to affix the buckram tightly, so while a ball would work, a balloon wouldn't. Ok, let's move into the directions.
Buckram is a fabric stiffened with wheat paste or something like that, typically used in millinery. Much like plaster gauze, its like a sheet when you get it, and has to be wet to be molded. Typically milliners use a steam machine to steam it, but you can use a kettle to steam it; or if you're impatient like I am, just dump the boiling water over it and soak the whole damn thing. :) Faster than steaming, and I didn't note any ill effects. Once its wet and hot its pliable. So this is how it looks when you get it.
 |
And this is how it looks once I dumped boiling water on, stretched it over my hatblock (cover the hatblock with plastic wrap first!) and pulled the edges tight with a rubber band.
I let it dry overnight, and then pulled off the now-stiff buckram. If I were doing little round cocktail hats, I could get several from one cast, with the teardrop shape that I'm doing, its a bit bigger so one cast will yeild just one teardrop hat base. I'd likely get two teardrops if I'd done my design just a wee bit smaller, but I wanted a big dramatic one. It measures just a bit over 7 inches, which is the usual size for the largest teardrop bases.


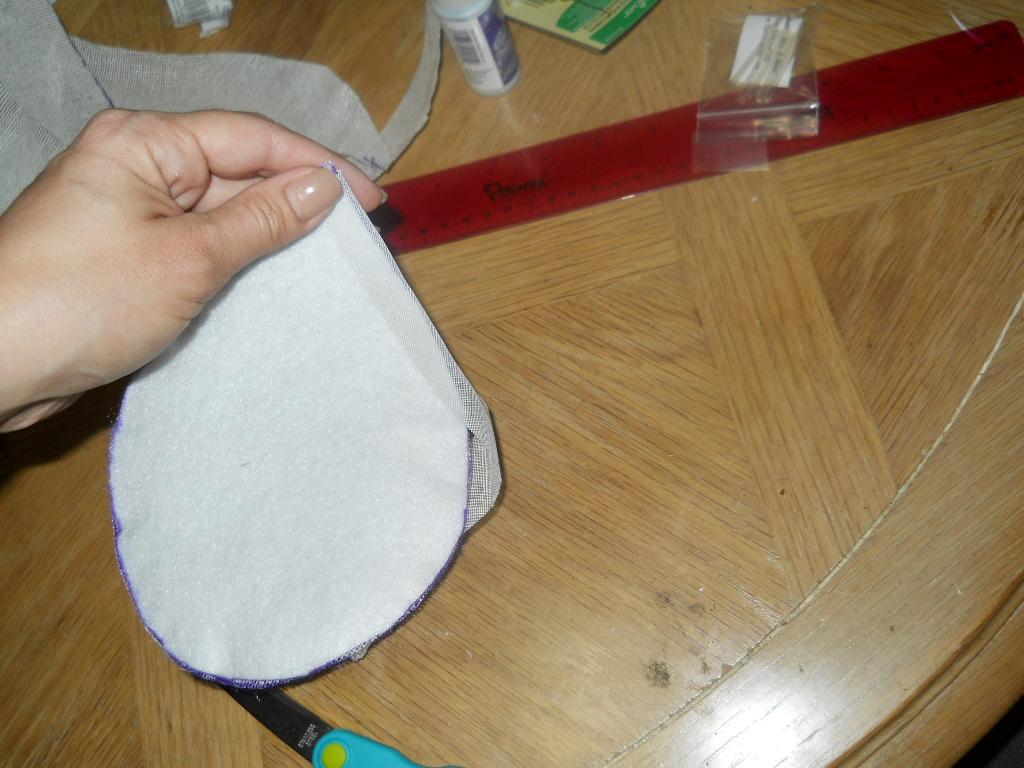

 So, this is where I left off, a nearly complete hat base. :) Another reason to make your own is that you can make it the size and shape your little heart desires.
So fabulous! I loooooove your new blog!! You are so adorably crafty! And now I know what buckram is!
ReplyDeletethanks Cheets! I'm actually glad to have a deadline for this project :) It keeps me on task
ReplyDelete